
Free images tag: 9M3W2AT
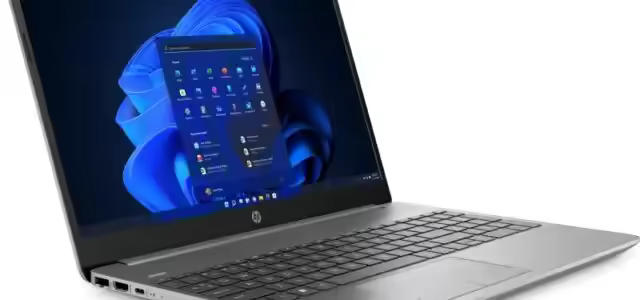
The HP 255 G9 laptop comes in several different configurations and can have the code 9M3W2AT #ABU.
Some questions we get asked about the HP G9 laptop are:
- 'Can you replace the SSD in an HP G9 255',
- 'Can I add more RAM to my 9M3W2AT#ABU laptop' and
- 'where is the battery in my HP G9 laptop'?
The answer to these questions is, YES, but it is not an easy job if you don't know the HP secrets.
About the laptop
There can be 8Gb DDR4 3200 RAM, on one SODIMM, with a spare and empty slot for another stick, but how do you open it up to fit more RAM?
There is a 2280 M.2 SSD stick on the motherboard, that is often shipped with a minimal 256Gb storage. It is possible to fit a larger 2280 PCIe SSD, but it is not obvious how to remove the cover to find the mainboard.
Upgrades
All of the upgrades are possible, if only one solution could be found, and that is how to strip down the 9M3W2AT#ABU, G9 HP255 laptop to get access to the components inside.
This guide will identify the secret fixings and show you how to open the HP G9 255 to replace the SSD or add more RAM.
Screws
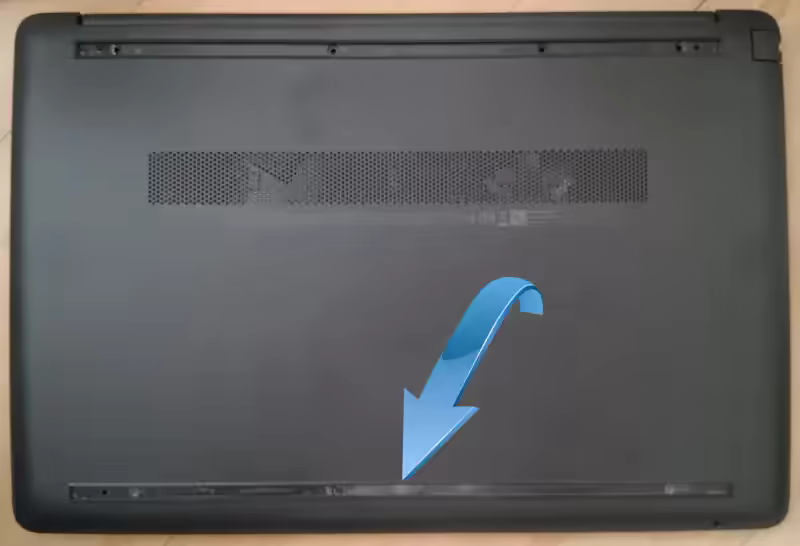
Switching off the laptop and flipping it over will reveal two black cross-head screws in each corner on the front edge of the base.
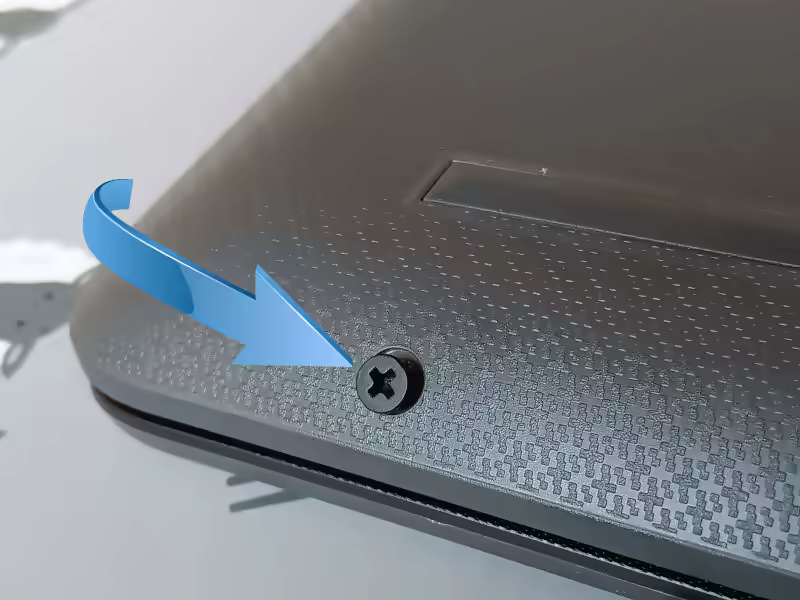
these two screws are easily removed. There are only two of the black screws of that length on this laptop.
Hidden Screws
There are many more hidden screws on the HP G9 255 laptop than there are visible screws. This is one of the keys to accessing the mainboard to see the SODIMM slot and m.2 connector.
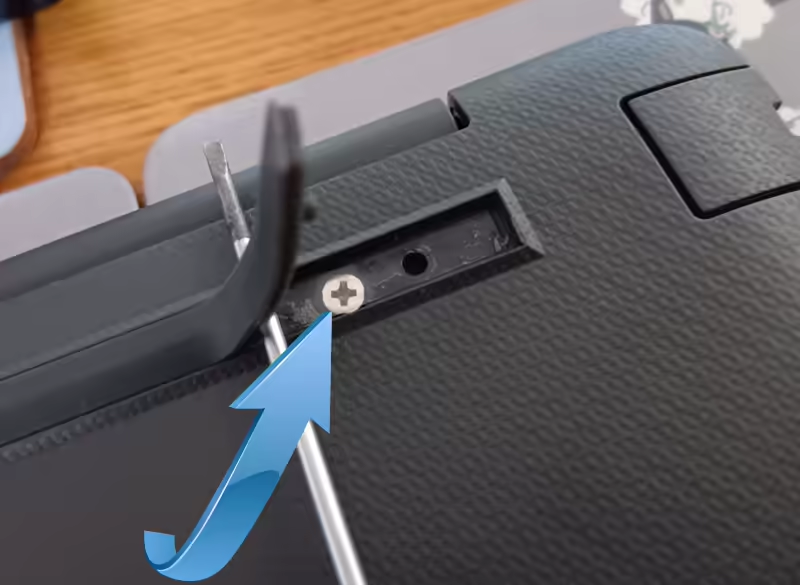
There are two rubber strips across the base of the laptop, not only are these functional to prevent the laptop from slipping as you type but they also hide the hidden fixing screws.
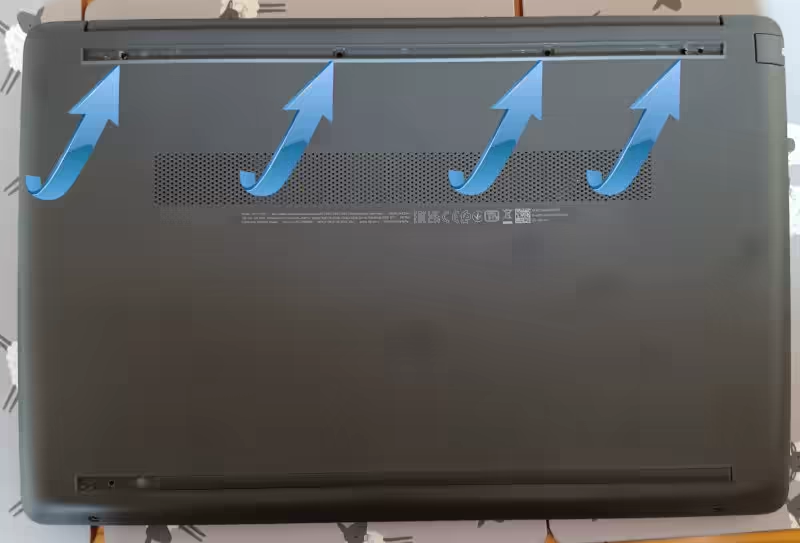
There are five hidden screws, four under the upper rubber strip near the hinge and one on the lower rubber strip by the lid opening. You need to fully remove the hinge end rubber strip to reveal all 4 of the screws. while the opening hidden screw is halfway, central to the rubber strip.
These secret screws are chrome plated and all 5 are the same length and thread.
That's 7 screws to remove, two short and black (exposed) while 5 are chrome plated and relatively long (hidden).
Be cautious lifting the rubber strips from the laptop. They are fixed in position with double-sided tape and the rubber is quite weak. I pulled too hard on the rubber and snapped it. If you make a mess of the double-sided sticky, you may need to source some replacement to affix the rubber strips on reassembly.
Clips
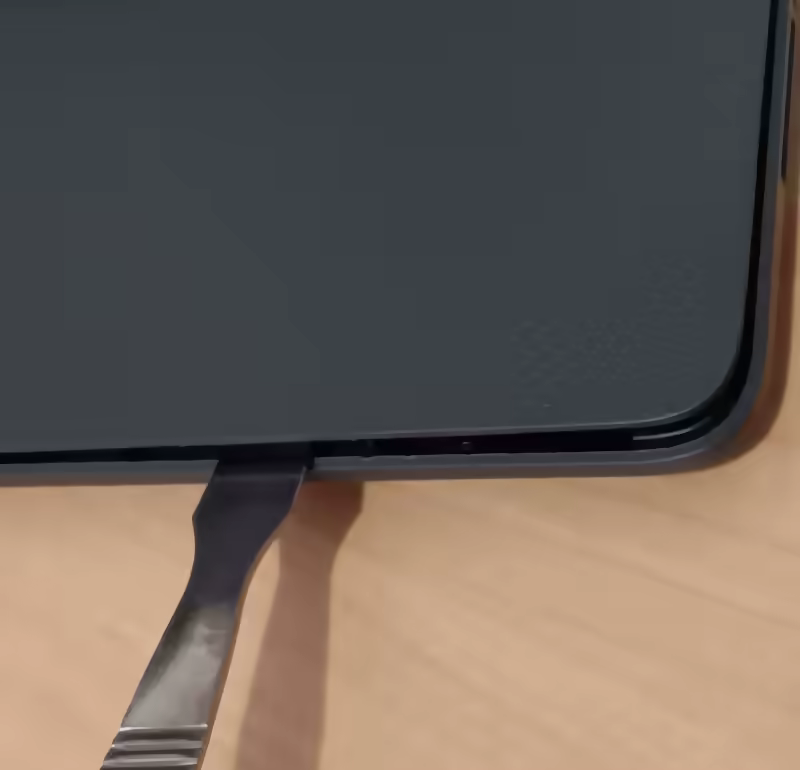
With the screws removed the base is still attached to the top of the laptop with hidden clips. With the laptop, the correct way up, carefully slip a spudger tool in the small gap between the plastic top and base that runs around the perimeter of the laptop. Gently unclip each of the hidden fixings by levering the two plastics apart. The gap between the two halves will grow as you work your way around the laptop, levering off each of the reusable clips.
With all the clips released the plastic base is released and can be lifted off the laptop. There are no components attached to the base, it is free to be lifted away.
Mainboard
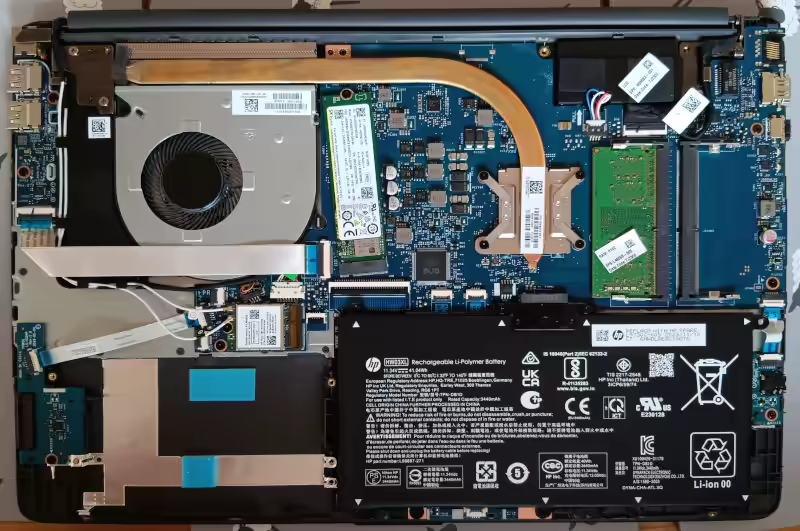
With the base now removed, the mainboard is revealed.
You now have access to:
- Battery
- SODIMM RAM strip
- Empty SODIMM Slot
- M.2 2280 SSD
- Ryzen Processor with heatsink
- WiFi card
Components
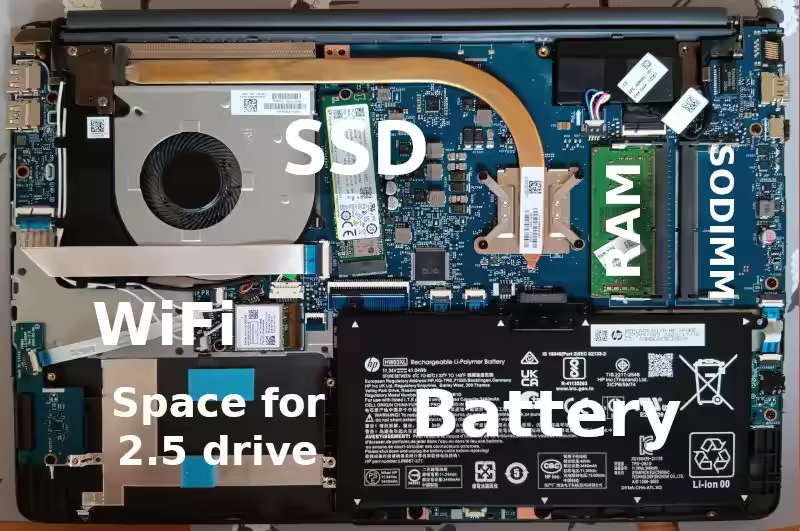
Note the 2280 SSD, the is only one fixing for the SSD and that is fixed in position for the 2280 exclusively, no other size SSD will physically fit.
Also, the Spare for a 2.5" drive is available, but the SATA to FFC lead is missing.